A Tuesday morning refresh rarely looks like a clean technology project. New desktop towers are still stacked on pallets, technicians are opening boxes beside occupied workstations, and the machines being replaced are gathering near the loading dock. The installation team is focused on getting users productive, while facilities is left with old hardware, packaging, cables, storage media, and an unclear handoff.
That is why desktop computer installation should be managed as a two-sided operation. The new machines need to be configured, secured, connected, and validated. The old machines need asset control, secure data destruction, documented disposition, and responsible recycling. A successful refresh closes both loops.
Why Desktop Computer Installation Now Spans Setup and Retirement
A desktop refresh is incomplete when the replacement reaches the Windows desktop. The outgoing tower may still hold business records, authentication material, or customer information. Its asset tag must match the inventory record, and its hard drive or SSD requires controlled handling.
The installed base shows why retirement belongs in the same project. Global desktop PC data recorded growth from about 341 million installed units in 2005 to roughly 449 million in 2015 (global desktop PC installed-base data). The U.S. Department of Energy estimated 76 million desktop computers within an installed base of 106 million personal computers, confirming how desktops were embedded in commercial infrastructure (U.S. Department of Energy commercial applications report).
The loading dock is part of the installation plan
A mid-size operations floor may replace workstations in batches. The deployment lead can have a clean imaging process and still lose control of the project if removed machines sit unprotected, serial numbers go unreconciled, or no vendor confirms what happened to the storage media.
The market shifted toward portable devices, yet replacement programs continued producing desktop assets that required controlled retirement. Treat the installation as a two-sided process: configure and validate the new machines, then secure, document, and route the old ones for reuse, donation-based recycling, parts recovery, or certified destruction through partners such as Reworx Recycling.
Practical rule: Before calling a replacement installed, assign the outgoing machine an owner, a secure holding location, a disposition decision, and a record.
Use an IT team training guide to assign repeatable responsibilities for technicians, facilities staff, and the retirement partner. Connect those duties to device lifecycle management, including secure data destruction and documented disposition. Installation then closes both loops instead of leaving the loading dock with an unmanaged security and recycling problem.
Planning the Rollout Before You Open a Single Box
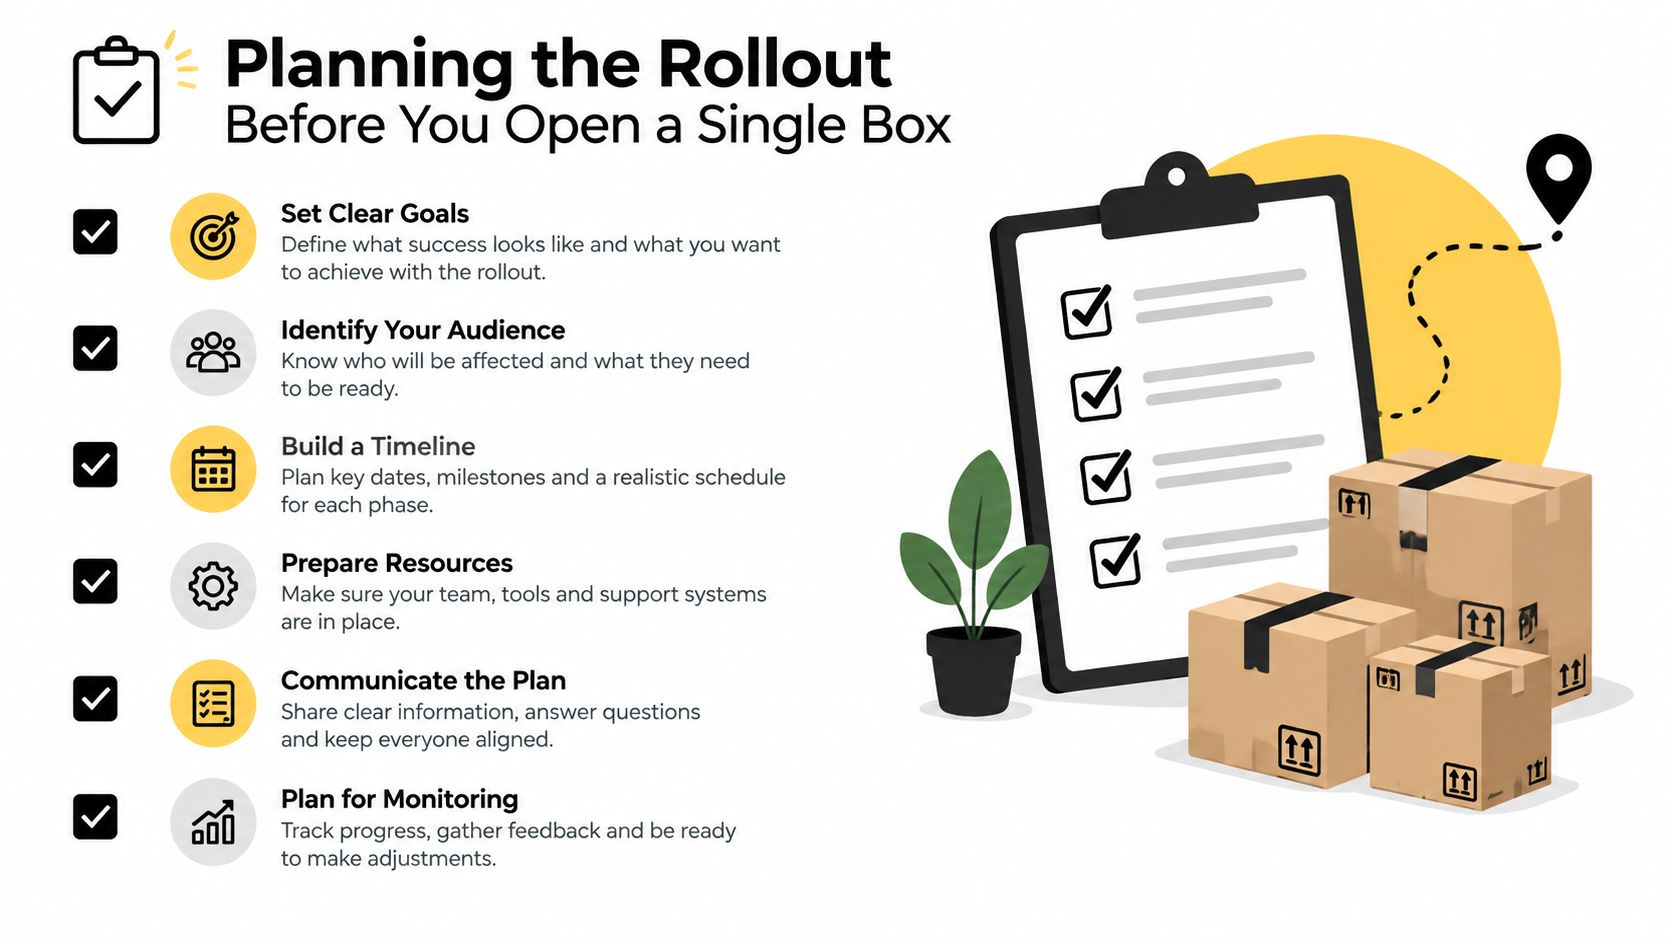
A 50-machine refresh is won or lost before the first carton is opened. Start with a complete inventory of the incoming and outgoing equipment, then assign one person to reconcile the records. Capture asset tags, serial numbers, current operating-system build, warranty status, assigned user, location, and final disposition path for every machine being replaced.
Build the rollout register
Export the retirement list to the team handling recycling or IT asset disposition. Mark each outgoing device for reuse, donation, resale, parts recovery, or certified destruction. Don't leave those decisions until the new equipment is installed. The old machine can be functional and still require secure data destruction before it moves anywhere.
Use the same register for incoming equipment. Record the purchase order, chassis type, monitor arrangement, firmware revision, and assigned desk. A structured asset inventory management process makes it easier to identify missing units, duplicate serial numbers, and machines that never reached final sign-off.
Audit compatibility before staging
For Windows 11, verify that each computer has a 1 GHz or faster processor with two or more cores, 4 GB of RAM, 64 GB of storage, UEFI firmware with Secure Boot capability, TPM 2.0, and a DirectX 12-compatible graphics card. The display must be larger than 9 inches diagonally and support 720p resolution (Windows 11 system requirements).
For Windows 10, the stated minimums include a 1 GHz processor, 1 GB of RAM for 32-bit systems or 2 GB for 64-bit systems, 32 GB or more of hard-disk space for newer versions, DirectX 9 or later with a WDDM 1.0 driver, and an 800 x 600 display (Windows 10 system requirements). Treat these as installation gates, not suggestions.
Prepare the floor
Stage surge protection, labelled Ethernet drops, monitor stands or arms, power cables, keyboard and mouse sets, and cable-management supplies. Check that multi-monitor layouts fit the desks before deployment day. Confirm that the imaging server, PXE environment, USB media, golden image, answer files, and driver packs are current.
Book the outgoing-equipment pickup for the same deployment window. A locked, labelled quarantine area is better than one without those protections, but neither should become a permanent storage plan.
Physical Setup, First Boot, and Firmware Basics
Physical assembly is simple only when the team treats it as controlled work. Use a clean, flat, static-free surface and compare every carton with the packing list before discarding foam or packaging. If a screen arrives cracked or a chassis is dented, keeping the shipping material may be essential for a damage claim.
Place the tower where airflow isn't blocked and connect it to suitable surge protection. Attach the monitor, keyboard, mouse, and Ethernet before the first power-on. Pair wireless peripherals after the operating system is running, not while technicians are still trying to determine whether the machine boots correctly.
Check the firmware before imaging
Enter UEFI on the first boot and verify the boot order, firmware date, storage visibility, and memory recognition. If the deployment baseline requires them, enable Secure Boot and TPM 2.0 before launching the operating-system installer. Apply the vendor's approved BIOS or UEFI update before imaging when the revision is older than the organization's baseline.
Confirm the processor, memory, storage, and chassis against the purchase order. A wrong configuration discovered after deployment creates avoidable desk-side work. Save the firmware settings, reboot into the boot menu, and select the approved PXE or USB path.
Make the cabling serviceable
Cable management isn't cosmetic. Label power, display, Ethernet, and peripheral cables at both ends where practical. Route them so a technician can replace a monitor or docking component without dismantling the entire workstation. Use tie-wraps or reusable hook-and-loop straps, and leave enough slack for monitor movement without creating loops under the desk.
A consistent physical layout also helps remote support. A technician who knows where the Ethernet lead, display cable, and power connection should be can troubleshoot faster than one facing an undocumented bundle.
Floor standard: If a technician can't identify the power, network, and display paths without moving the entire desk, the installation isn't finished.
Keep the removed packaging organized until acceptance testing is complete. If outgoing equipment must later be transported, follow a documented electronics shipping and packing process rather than stacking unprotected towers in a vehicle.
Operating System Deployment and Driver Configuration
Don't install the operating system manually on every workstation. Treat the rollout as a Configuration Manager, PXE, or equivalent deployment workflow with a controlled image and clear checkpoints.
First, enforce the system-requirement gates from the planning phase. Then deploy a pilot wave to a small group of representative machines, including the different chassis, graphics adapters, monitor combinations, and network paths in the fleet. Validate the pilot before expanding to the remaining units. This approach exposes image, firmware, driver, and application conflicts while the affected population is still manageable.
Use one controlled baseline
A unified WIM or golden ISO with answer files removes repetitive prompts and reduces configuration drift. Set the firmware to boot from the approved PXE or USB source, confirm Secure Boot and TPM 2.0 are active, and record the image version assigned to each serial number.
After the first boot, install drivers in a deliberate order. Chipset and storage drivers establish the platform foundation. Network drivers restore reliable connectivity, while graphics, audio, and peripheral drivers complete the user environment.
| Step | Driver Category | Why This Order | Reboot Required |
|---|---|---|---|
| 1 | Chipset | Establishes motherboard and platform communication | Follow vendor package guidance |
| 2 | Storage controller | Ensures the operating system communicates correctly with storage hardware | Often |
| 3 | Network | Restores Ethernet or Wi-Fi connectivity for managed deployment and updates | Sometimes |
| 4 | Graphics | Enables the correct display modes and multi-monitor behavior | Often |
| 5 | Audio | Configures speakers, headsets, and conference peripherals | Usually not |
| 6 | External peripherals | Handles docks, printers, scanners, and specialized devices | Depends on device |
Control updates and policies
Schedule Windows Update or equivalent patching during maintenance windows. Pushing updates to an entire floor during working hours can consume bandwidth and interrupt users. Apply Group Policy or MDM profiles for power settings, BitLocker, standard applications, browser configuration, and endpoint security.
Microsoft's deployment guidance emphasizes discovery, rollout planning, and user training, while Configuration Manager diagnostics can track client installation sources, operating-system image use, and installation failures (Microsoft deployment readiness guidance). Document the image, driver pack, firmware revision, patch level, and policy state per machine. That record turns troubleshooting from guesswork into traceable support work.
Validating Performance After Deployment
A workstation that reaches the desktop has completed only the first check. Sign off each machine against measurable results linked to its serial number. A technician's general impression is not evidence.
Begin with boot and user-readiness timing. Record POST-to-desktop duration, then login-to-ready duration with the user profile, mapped drives, VPN, and required applications available. Test the department's actual workload, including core line-of-business software, rather than stopping at a browser and text editor.
Capture repeatable evidence
Use identical test conditions across the deployment wave. Record:
- Login duration: Measure credential submission to a usable desktop.
- Application response: Record launch and first-use behavior for core applications.
- Network behavior: Confirm the assigned Ethernet VLAN or Wi-Fi profile, then test connectivity against a known-good endpoint.
- Storage performance: Compare sequential and 4K random read and write behavior with the approved hardware baseline.
- Session stability: Test sleep, wake, display recovery, and peripheral reconnection.
- Resource pressure: Observe CPU, memory, graphics, storage I/O, and thermal behavior during a controlled workload.
Use performance validation and monitoring guidance alongside VDI performance testing guidance. Track login duration, desktop launch, application response, latency, CPU and memory use, storage I/O, disconnects, session stability, and user-experience results. Compare pre-change and post-change results, including tests during peak usage.
Run a controlled stress pass and watch for thermal throttling, graphics faults, storage errors, and driver crashes. Repeat sleep and wake tests to expose power-management failures. Put machines outside tolerance into a triage queue. Give passing systems an explicit sign-off in the asset record, with the evidence retained for support.
Handling the Old Desktops, Data, and Packaging
A 50-machine refresh creates two work queues: deploying the replacements and retiring the outgoing desktops. Treat every removed device as an operational and compliance liability until its data, custody, and final disposition are documented.
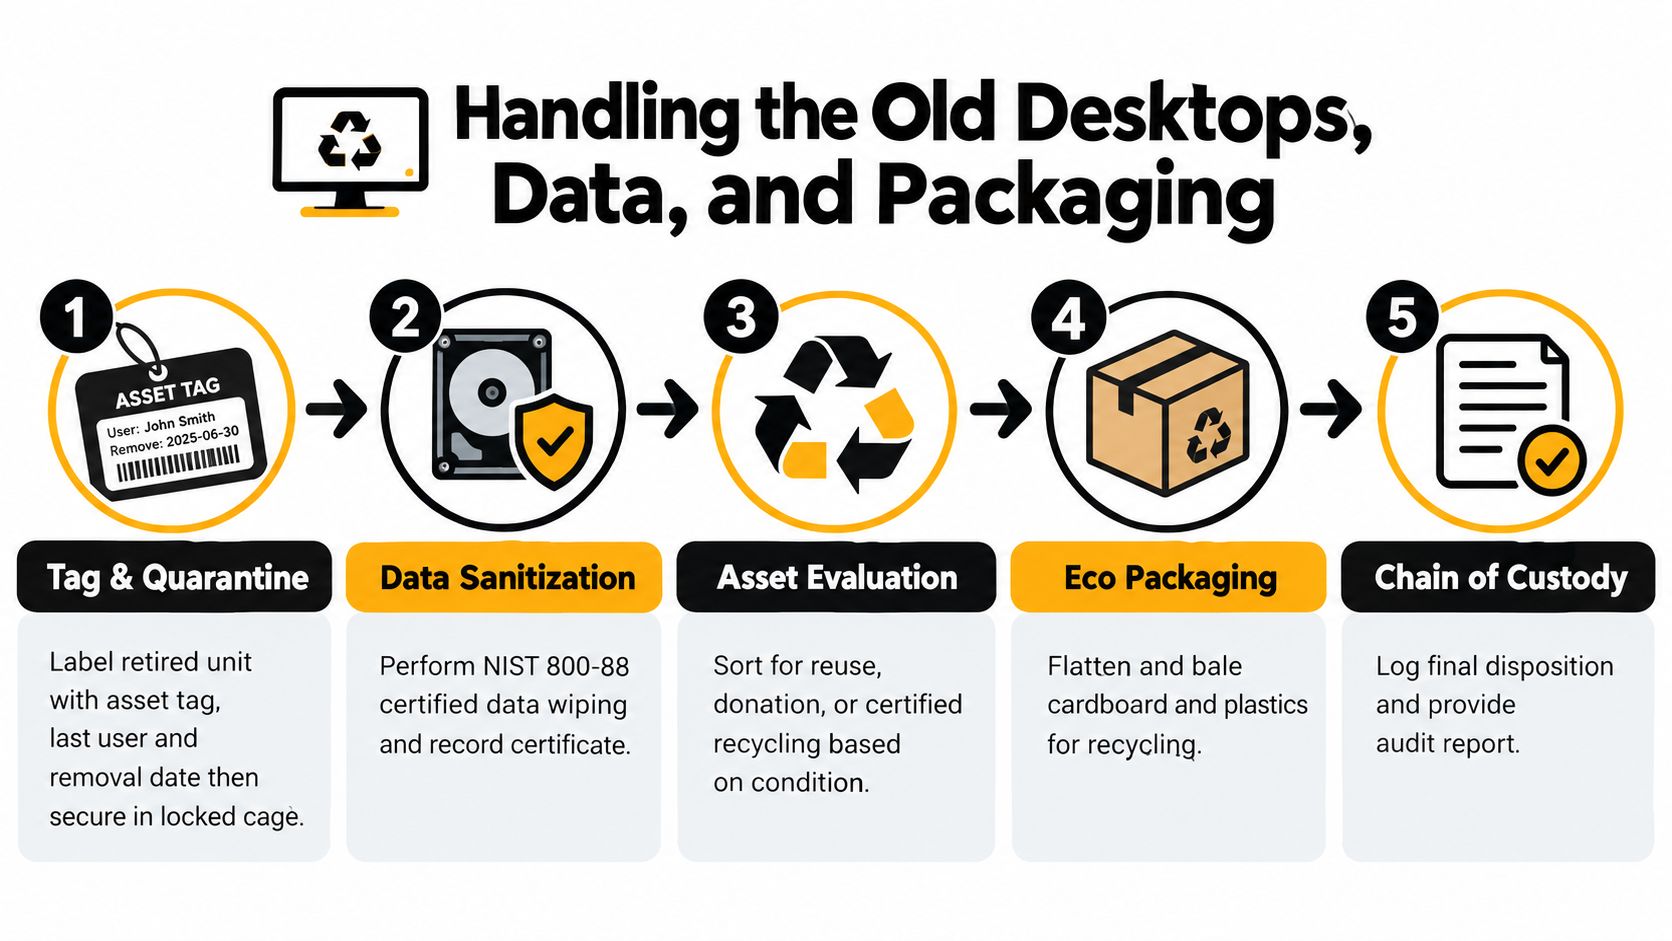
Begin at removal. Record the asset tag, last user's name or identifier, removal date, and destination status. Move each machine to a locked staging area, separating equipment awaiting sanitization from equipment cleared for reuse, donation, or recycling. Use this safe disposal guide for old computers to keep the retirement path defined before collection begins.
Sanitize before sorting
NIST SP 800-88 identifies clear, purge, or destroy as accepted media-sanitization approaches. Simple formatting or informal file deletion does not meet that standard (NIST SP 800-88 sanitization guidance).
Match the method to the storage media. A cryptographic erase can suit an SSD when the environment supports it. Spinning disks may require an approved overwrite, degaussing, or destruction path. Record the device serial number, sanitization method, verification result, operator, and certificate identifier.
Keep reusable RAM, SSDs, and wireless cards with the device until storage sanitization is complete. After clearance, separate reusable components from end-of-life stock so the disposition record stays accurate.
Treat logistics as part of security
Hard drives, SSDs, phones, tablets, and copiers with internal storage require data destruction before or during recycling. Document chain of custody and retain certificates of destruction for handled equipment (e-waste disposal and data-bearing-device guidance).
Functional machines can support community programs rather than going straight to material processing. Reworx Recycling coordinates business pickup, equipment decommissioning, secure hard-drive shredding with data destruction, IT asset management, and donation-based recycling. Its social enterprise connects electronics recycling with technology donations, digital inclusion, and workforce development.
Packaging needs a separate workstream. Sort cardboard, foam, and plastic, then send each material through the appropriate recycling route. Update the asset system the same day with disposition codes and certificate IDs.
A Repeatable Playbook and Next Steps With Reworx Recycling
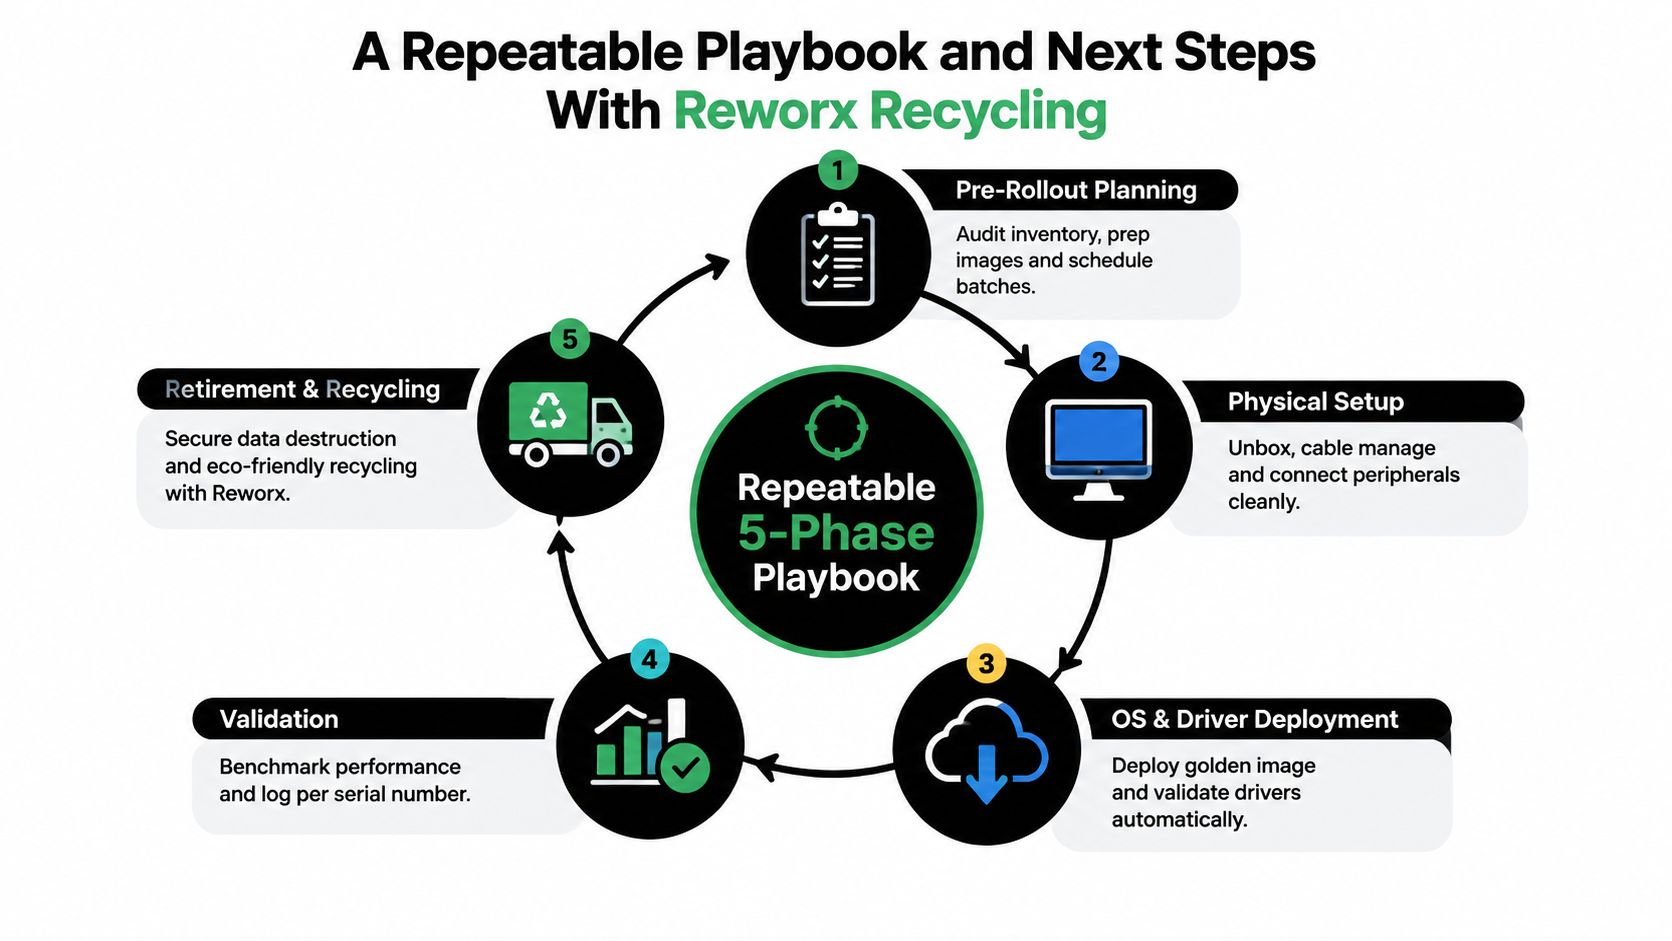
A reliable refresh uses five phases, each with an owner and an exit condition:
- Pre-rollout planning: IT and facilities reconcile inventory, confirm requirements, prepare images, and schedule deployment and collection. Exit when every incoming and outgoing unit has a recorded path.
- Physical setup: Technicians verify contents, connect power and peripherals, check firmware, and label cables. Exit when the hardware passes the first-boot checklist.
- Operating-system and driver deployment: The deployment owner applies the approved image, drivers, policies, encryption, and standard applications. Exit when the configuration record is complete.
- Validation: Support staff test login, applications, network, storage, sleep and wake, and stability. Exit when the machine is signed off by serial number.
- Retirement and recycling: Facilities and the ITAD partner quarantine, sanitize, document, reuse, donate, recycle, or destroy the outgoing equipment. Exit when certificates and final disposition records are attached to the asset record.
The environmental case is immediate. The Global E-waste Monitor reported 62 million metric tons of e-waste in 2022 and projects 82 million metric tons by 2030 (global e-waste data and projection). That makes office cleanout, facility cleanout, computer recycling, and sustainable recycling part of the same planning conversation as deployment.
Reworx Recycling can coordinate pickup scheduling, secure data destruction, equipment decommissioning, and donation-based recycling. A documented partner process also supports corporate donation programs, IT asset disposition, and responsible handling of desktops that still have useful life.
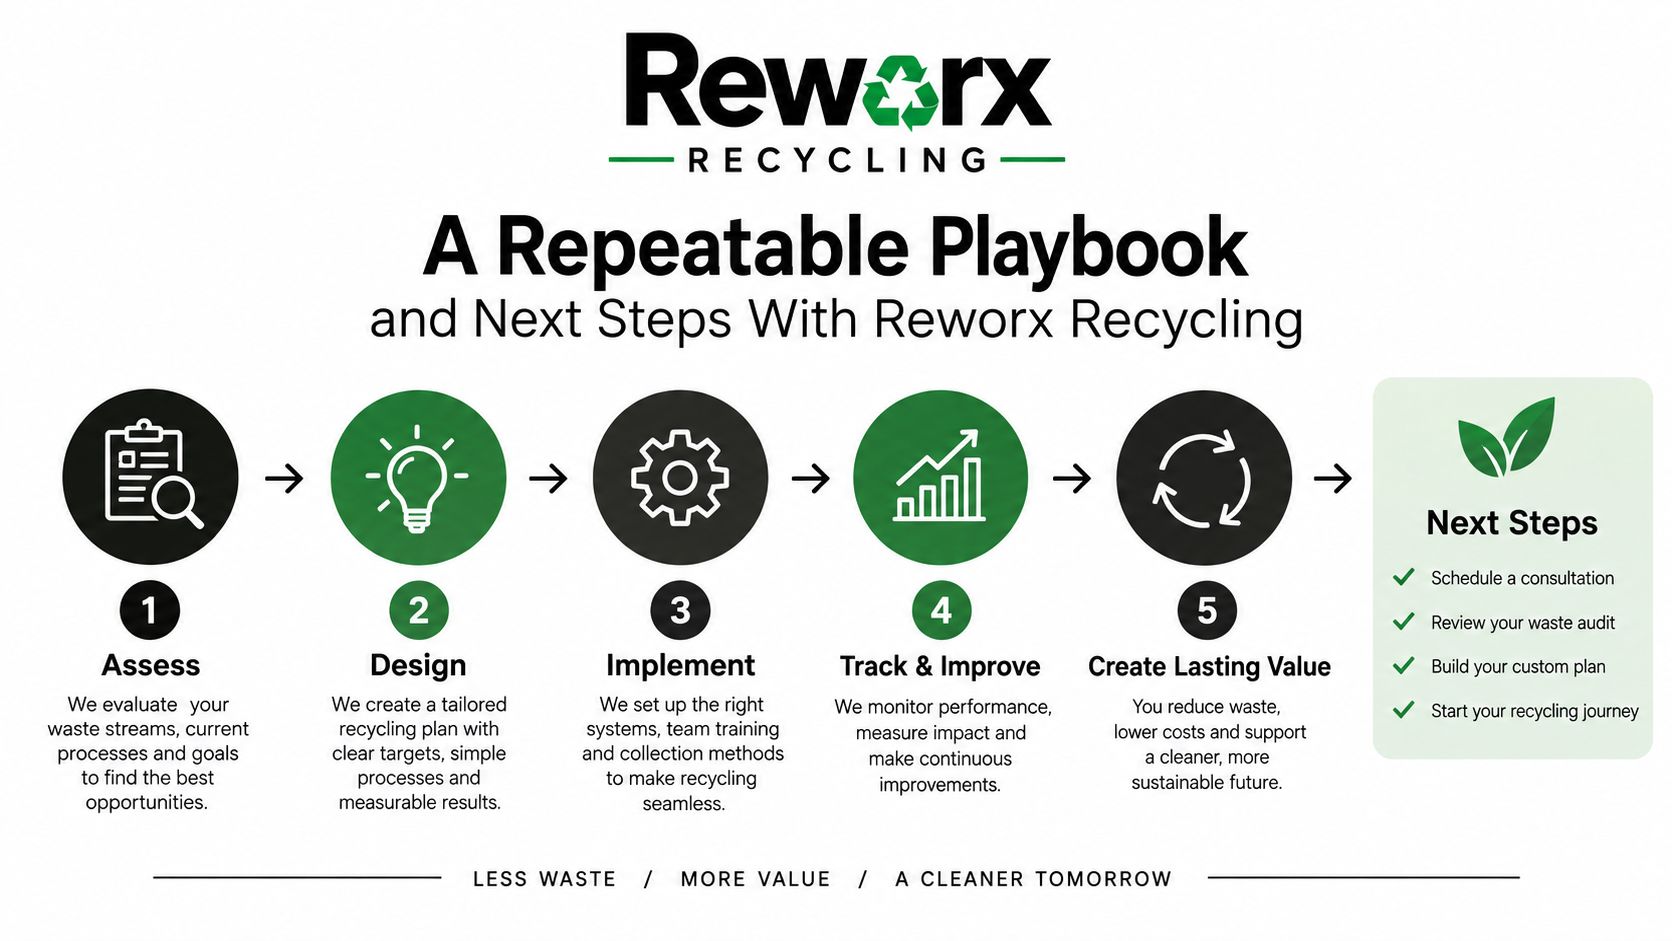
Reworx Recycling helps businesses coordinate desktop pickups, secure data destruction, equipment decommissioning, and donation-based recycling during technology refreshes. Visit Reworx Recycling to plan the retirement of your outgoing machines alongside the installation of the new fleet, and schedule the next step before equipment reaches the loading dock.