
Retiring old servers is far more complex than simply powering them down and unplugging a few cables. For modern organizations, from growing businesses to enterprise-level data centers, server decommissioning is a critical operational process fraught with significant risks. A misstep can lead to catastrophic data breaches, costly regulatory fines, and severe environmental penalties. Without a clear plan, what should be a routine IT task can quickly spiral into a logistical, financial, and security nightmare.
This is precisely why a meticulously planned server decommissioning checklist is an indispensable tool for IT managers, operations leaders, and corporate sustainability leaders. It transforms a high-stakes, complex challenge into a structured, secure, and value-driven process. A strategic checklist ensures that every dependency is mapped, all sensitive data is securely eradicated, and each asset is accounted for from the rack to its final disposition.
This guide provides a comprehensive 10-step checklist designed to navigate every stage of server retirement, from initial data security assessments to final compliance certification. Furthermore, we will explore how integrating a certified social enterprise like Reworx Recycling into your IT asset disposition (ITAD) strategy can ensure both security and compliance. This partnership can align your decommissioning project with corporate social responsibility goals, turning retired hardware into tangible community benefits and reinforcing your commitment to a circular economy.
1. Data Security Assessment and Classification
The first and most critical step in any comprehensive server decommissioning checklist is the data security assessment and classification. Before a single cable is unplugged, you must know precisely what information resides on each server. This foundational process involves inventorying all systems slated for retirement, identifying the data they contain, and classifying it according to its sensitivity level. This ensures that data is handled appropriately throughout the entire secure data destruction and IT equipment disposal process.

This initial assessment dictates the entire decommissioning pathway. Servers holding public-facing, non-sensitive data may require a different data destruction method than those containing regulated information like Protected Health Information (PHI) under HIPAA or payment card data governed by PCI-DSS. Neglecting this step exposes your organization to significant risks, including data breaches, financial penalties, and severe reputational damage.
Why This Step Is Crucial
Proper classification ensures regulatory compliance and protects your organization from liability. For example, a healthcare provider retiring a server must certify the absolute destruction of patient records, while a financial firm must prove transaction data was handled according to industry mandates. This meticulous documentation provides an auditable trail, demonstrating due diligence to stakeholders and regulators. It forms the bedrock of a secure and compliant IT asset disposition (ITAD) strategy.
Actionable Implementation Tips
To execute this step effectively, follow a structured approach:
- Develop a Data Classification Matrix: Create a standardized framework for your organization (e.g., Public, Internal, Confidential, Regulated). This ensures consistency across all departments.
- Engage Stakeholders: Conduct interviews with department heads and data owners. They can reveal "hidden" data repositories or applications that IT might not be aware of.
- Use Automated Tools: Leverage data discovery tools to scan servers for specific patterns, such as credit card numbers, Social Security numbers, or specific keywords related to intellectual property.
- Centralize Documentation: Log all findings in a Configuration Management Database (CMDB) or a dedicated decommissioning project tracker. This becomes your single source of truth.
- Collaborate Early: Involve your legal and compliance teams from the very beginning to ensure your classification policies align with all relevant regulations.
2. Stakeholder Notification and Planning
Once data has been classified, the next essential step in a server decommissioning checklist is comprehensive stakeholder notification and planning. This involves communicating with all affected departments, users, and leadership about the timeline, expected impacts, and transition plans. Effective coordination across IT, operations, finance, and end-users is non-negotiable for preventing business disruptions and ensuring a smooth transition during a facility cleanout or data center decommissioning.
This proactive communication phase sets expectations and aligns the entire organization around the decommissioning project. Neglecting to inform a department that relies on a specific server can lead to unexpected downtime, lost productivity, and internal friction. Whether it’s a government agency following formal change management protocols or a university coordinating around the academic calendar, a well-documented communication plan is the key to preventing operational chaos and ensuring business continuity.
Why This Step Is Crucial
Clear and early communication ensures that all parties understand their roles and responsibilities. It allows application owners to schedule migration activities, finance departments to update asset ledgers, and end-users to prepare for potential service interruptions. For instance, a hospital must coordinate with clinical staff to ensure patient care systems are transitioned outside of peak hours. This documented communication trail also provides critical evidence of due diligence and organized change management, which is often required for compliance audits.
Actionable Implementation Tips
To manage stakeholder communications effectively, implement a structured plan:
- Create a RACI Matrix: Develop a chart that clearly defines who is Responsible, Accountable, Consulted, and Informed for each task in the decommissioning process.
- Schedule Early Kickoff Meetings: Bring all key stakeholders together 60-90 days before the planned decommissioning to review the project scope, timeline, and potential risks.
- Establish a Communication Cadence: Provide regular status updates via email, project dashboards, and brief status meetings to keep everyone aligned and address issues proactively.
- Designate a Single Point of Contact: Assign a project manager or coordinator to handle all incoming questions and concerns, preventing confusion and mixed messages.
- Document All Approvals: Obtain and log written sign-offs from business owners and department heads before proceeding with each major phase, creating an auditable compliance record.
3. Data Backup and Migration Planning
After classifying your data, the next critical phase in the server decommissioning checklist is to execute a comprehensive data backup and migration plan. This step ensures business continuity by safeguarding all essential information and seamlessly transitioning active services to their new environment. It involves creating complete, verified backups of all data on the servers slated for retirement and then methodically migrating any live applications or services to replacement infrastructure with zero data loss or operational disruption.
This process is the safety net of the entire decommissioning project. A failed migration or a corrupt backup can lead to catastrophic data loss, halting business operations and causing irreparable damage. For example, a financial services firm must ensure transactional data is backed up and migrated with complete integrity to maintain audit trails. Similarly, a healthcare provider must guarantee patient data is transferred securely to a new system without any gaps. A well-documented backup and migration strategy prevents these worst-case scenarios and ensures a smooth transition.
Why This Step Is Crucial
Effective backup and migration planning directly supports business continuity and operational stability. It prevents the permanent loss of invaluable corporate data, intellectual property, and customer information. This step is not just about copying files; it's about verifying the integrity of those copies and ensuring they are fully restorable. A successful migration, validated and tested, gives stakeholders confidence that decommissioning the old hardware will have no negative impact on day-to-day business functions, protecting revenue and customer trust.
Actionable Implementation Tips
To ensure a flawless backup and migration process, implement these best practices:
- Follow the 3-2-1 Backup Rule: Maintain three copies of your data on two different types of media, with at least one copy stored off-site or in the cloud. This provides robust redundancy.
- Test Restore Procedures: Before decommissioning, regularly test your ability to restore data from backups. A backup is only useful if it can be successfully recovered.
- Establish a Migration Schedule: Create a detailed, phased migration plan with clear timelines, assigned responsibilities, and rollback procedures in case of failure.
- Validate Data Integrity: Use checksums or hash verification (e.g., MD5, SHA-256) on both the source and destination data to confirm that the migration was 100% accurate and no data was corrupted in transit.
- Document Everything: Securely document all backup locations, encryption keys, and access credentials. This documentation is vital for future data recovery or audit requests.
4. Secure Data Destruction and Sanitization
Once data has been migrated, the next critical phase in the server decommissioning checklist is its complete and irreversible removal. Secure data destruction and sanitization is the process of permanently eradicating all information from hard drives, SSDs, and other storage media. This step is non-negotiable for protecting sensitive corporate, customer, or regulated data from unauthorized access after an asset leaves your control.
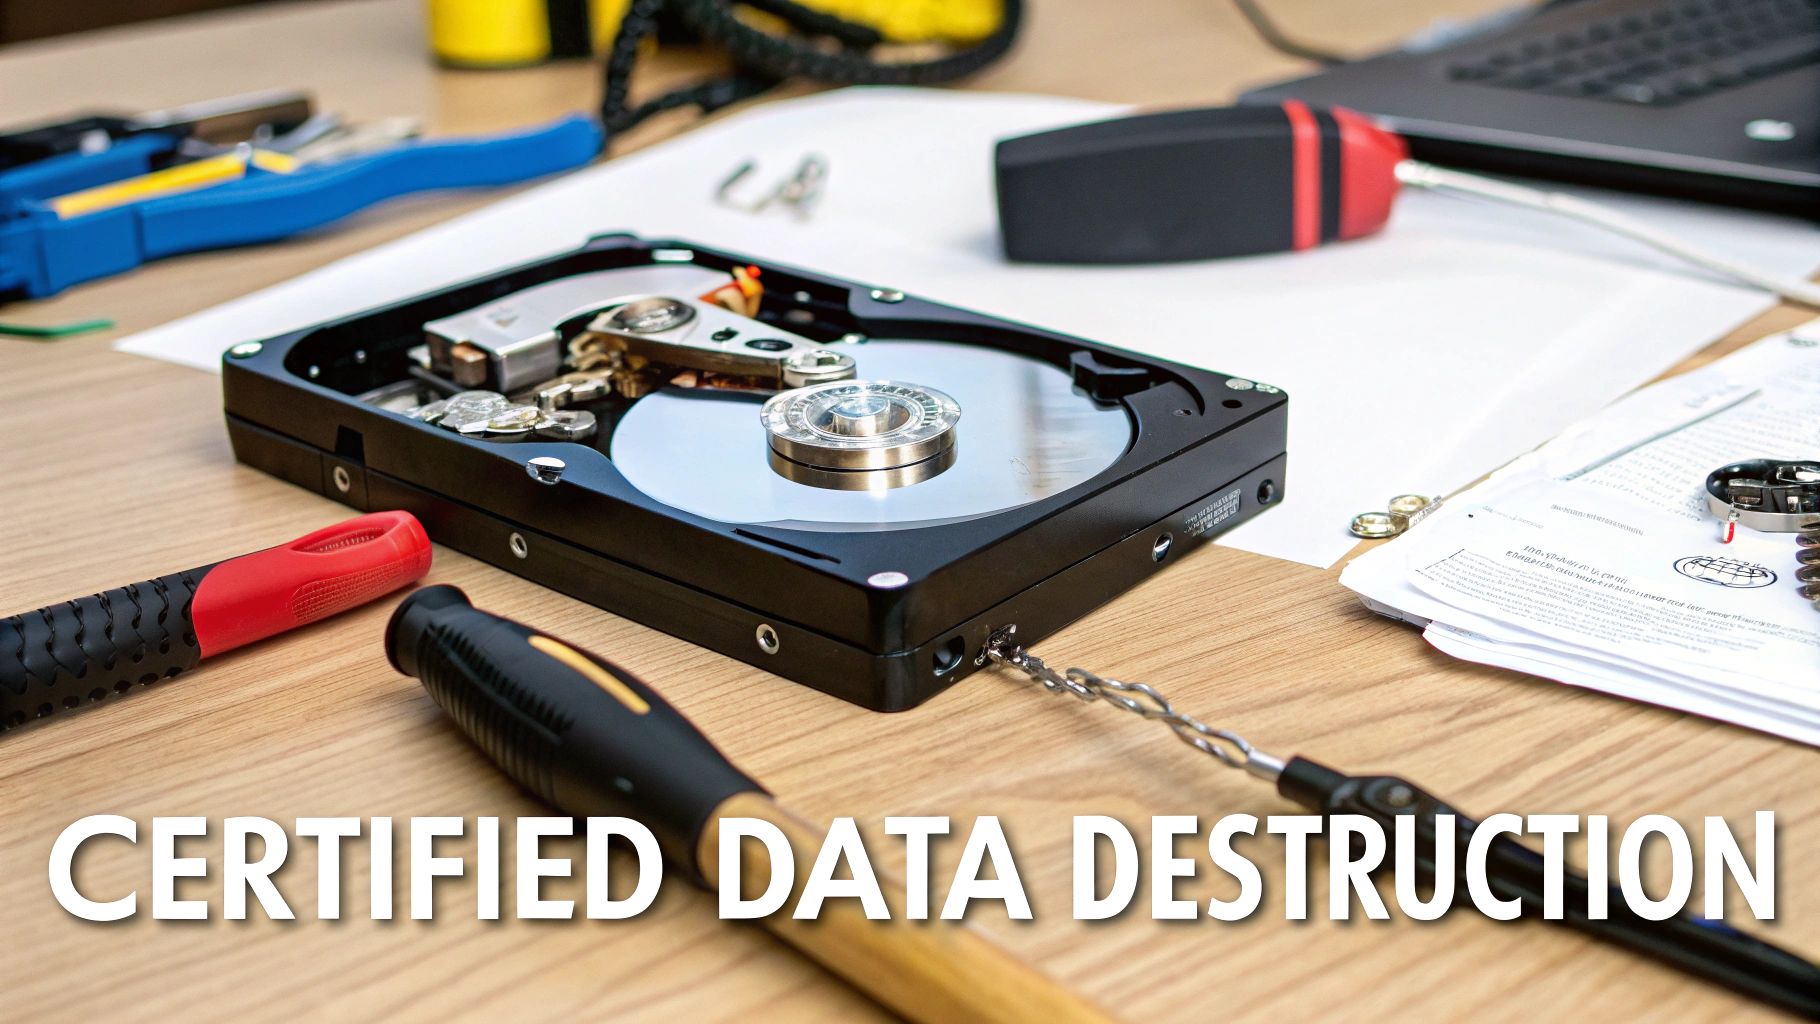
Simply deleting files or formatting a drive is insufficient, as data can often be recovered with forensic tools. Proper sanitization uses government and industry-certified methods, such as those outlined in NIST SP 800-88 or DoD 5220.22-M, to overwrite data multiple times or physically destroy the media. This ensures that even the most determined efforts cannot retrieve the original information, safeguarding your organization from breaches, legal penalties, and reputational harm.
Why This Step Is Crucial
This step directly translates your data classification policy into physical action, creating a legally defensible audit trail. For healthcare organizations retiring medical equipment, it provides auditable proof of HIPAA compliance. For defense contractors or financial institutions, it certifies adherence to strict DoD or PCI-DSS mandates. A certified ITAD partner like Reworx Recycling provides this assurance through documented processes, ensuring every piece of media is handled according to the highest security standards. This process is the ultimate safeguard against post-decommissioning data leaks.
Actionable Implementation Tips
To ensure data is completely and verifiably destroyed, follow these protocols:
- Choose the Right Method: Determine whether data wiping (software-based overwriting), degaussing (using powerful magnets), or physical destruction (shredding or pulverization) is appropriate based on your data’s sensitivity and media type.
- Require a Certificate of Destruction (CoD): Always demand a formal CoD from your ITAD vendor for every sanitized or destroyed asset. This document should list serial numbers and confirm the destruction method.
- Maintain a Detailed Inventory: Before handing off assets, document the make, model, and serial number of every hard drive and storage device. Match this inventory against the final CoD.
- Witness the Process: For highly sensitive data, arrange to witness the destruction process either in person or via secure video feed to verify compliance.
- Document Everything: Maintain a complete chain-of-custody log from the moment a server is taken offline to the final confirmation of data destruction. This documentation is vital for audits.
5. Physical Inventory Audit and Asset Tracking
Once data has been secured, the next logical step in a server decommissioning checklist is to conduct a meticulous physical inventory audit. This process involves systematically documenting all server hardware, peripherals, and internal components slated for retirement. It creates an authoritative and auditable record of every asset leaving your organization’s live environment, laying the essential groundwork for proper disposition, financial reconciliation, and a transparent chain of custody for all IT equipment disposal.

This audit is far more than just counting servers; it involves capturing detailed information like serial numbers, asset tags, hardware specifications (CPU, RAM, storage), and a thorough condition assessment. This granular data is vital for preventing asset loss, enabling accurate financial reporting for depreciation and write-offs, and supporting sustainable ITAD strategies. For instance, a government agency must track assets for budgetary accountability, while a university needs to document laboratory equipment disposal for grant reporting and potential reuse.
Why This Step Is Crucial
An accurate physical inventory is the cornerstone of responsible IT asset disposition (ITAD). It provides the verifiable data needed to decide whether an asset should be recycled, refurbished for donation, or resold to recover value. Without this record, assets can easily be misplaced or mishandled, leading to financial loss and security gaps. Furthermore, this documentation is indispensable for partners like Reworx Recycling, who rely on detailed inventory lists to plan logistics for pickup, processing, and executing secure data destruction, ensuring every component is accounted for from your facility to its final destination.
Actionable Implementation Tips
To ensure a comprehensive and error-free inventory audit, implement these best practices:
- Create a Standardized Template: Develop a pre-decommissioning inventory spreadsheet or database template with mandatory fields: Asset Tag, Serial Number, Make, Model, CPU, RAM, HDD/SSD Count & Size, and Condition.
- Leverage Barcode Scanners: Use mobile barcode scanners linked directly to your inventory system to capture serial numbers and asset tags quickly and accurately, minimizing manual data entry errors.
- Document with Photos: Take clear, high-resolution photos of each server, paying close attention to the asset tag, serial number label, and any pre-existing physical damage. This visual record is invaluable for resolving future disputes.
- Cross-Reference Existing Records: Compare your physical count against your CMDB, original purchase orders, and fixed asset register to identify and resolve any discrepancies before the hardware is moved.
6. Environmental Compliance and Regulatory Documentation
Once servers are physically removed, the focus shifts to their responsible end-of-life management. This critical step in the server decommissioning checklist ensures that all computer recycling and disposal activities adhere to a complex web of environmental laws. It involves understanding and complying with regulations like the Resource Conservation and Recovery Act (RCRA), various state e-waste laws, and even international standards. Proper documentation proves that electronic waste is handled responsibly and hazardous materials are managed safely.
This process is not merely about recycling; it's about certified, auditable compliance. For instance, an organization in California must navigate strict e-waste laws like AB 2298, while a multinational corporation may need to comply with the EU’s WEEE Directive for its overseas operations. Failing to meet these standards can result in hefty fines, legal action, and significant damage to your corporate reputation and sustainability goals.
Why This Step Is Crucial
Meticulous environmental compliance protects your organization from legal liability and reinforces its commitment to corporate social responsibility. It demonstrates to stakeholders, customers, and regulators that you are a responsible environmental steward. Maintaining a detailed paper trail of how and where e-waste was processed is non-negotiable. Furthermore, beyond initial processing, the long-term secure and efficient archiving of documents is crucial for legal and regulatory compliance, particularly for sensitive decommissioning records.
Actionable Implementation Tips
To ensure your decommissioning process is environmentally sound, follow these guidelines:
- Partner with Certified Recyclers: Only work with ITAD vendors holding R2 or e-Stewards certifications. These credentials guarantee they follow the highest standards for environmental protection and data security.
- Research Local and Federal Laws: E-waste regulations vary significantly by state and country. Proactively research all applicable laws for your operating regions to avoid compliance gaps.
- Demand Detailed Reporting: Require your ITAD partner to provide Certificates of Recycling and Destruction. These documents serve as your official record of compliant disposal.
- Maintain Records for Audits: Keep all e-waste disposition records, including chain-of-custody forms and certificates, for a minimum of three to five years to be prepared for potential audits.
- Incorporate into Sustainability Reports: Showcase your responsible e-waste practices in annual corporate sustainability reports to build brand trust and demonstrate commitment to environmental goals.
7. Financial Reconciliation and Asset Write-offs
Beyond the technical tasks, a complete server decommissioning checklist must address the financial lifecycle of the asset. This crucial step involves formally removing the decommissioned servers from your company's financial records. This accounting process ensures your balance sheet is accurate and that all assets are properly accounted for, from initial purchase through final disposition. It's the bridge that connects IT operations with the finance department.
This process includes calculating final depreciation, writing off any remaining book value, and accounting for any proceeds from asset recovery or costs associated with disposal. Proper financial reconciliation is not just good bookkeeping; it's essential for regulatory compliance, accurate tax reporting, and transparent audits. Forgetting to update financial records can lead to "ghost assets" on the books, which can skew financial reporting and create significant accounting headaches down the line.
Why This Step Is Crucial
Proper financial reconciliation provides a clear and auditable record of an asset's entire journey. When a company recovers value through reselling equipment, that income must be correctly recorded. Similarly, when a social enterprise like Reworx Recycling provides a receipt for donated equipment as part of a corporate donation program, your organization can use that documentation for potential tax deductions. This step ensures your financial statements accurately reflect the company's current assets and maximizes any available financial benefits from the ITAD process.
Actionable Implementation Tips
To ensure a smooth financial close-out for your decommissioned servers, follow these steps:
- Engage Finance Early: Involve your accounting and finance teams at the very beginning of the decommissioning project to align on processes and documentation requirements.
- Obtain Value Assessments: For newer equipment with potential residual value, get a Fair Market Value (FMV) assessment from your ITAD partner to inform buyback negotiations or donation valuations.
- Document All Transactions: Whether it's a sale, a donation, or a recycling fee, maintain meticulous records of all financial transactions related to the asset's disposition.
- Link Assets to Records: Maintain a detailed spreadsheet or use your CMDB to link the physical asset tag of each server to its corresponding entry in your accounting or fixed asset register.
- Update Fixed Asset Register: Once disposition is complete, ensure the finance team formally removes the asset from the fixed asset register to finalize the write-off.
8. Application and Service Dependencies Mapping
Pulling a server offline without understanding its connections to other systems is like removing a brick from a Jenga tower blindfolded. Application and service dependency mapping is the process of identifying and documenting every single application, service, and business process that relies on the server slated for decommissioning. This crucial step prevents unexpected outages and ensures a smooth transition by revealing the intricate web of connections within your IT ecosystem.
This process goes beyond just the primary application hosted on the server. It uncovers secondary systems, microservices, databases, and even user-facing portals that might be affected. A financial institution, for example, might find that a seemingly isolated trading server also provides critical data feeds to a separate compliance reporting system. Decommissioning it without a plan would disrupt not just trading but also regulatory reporting, creating a cascade of failures. This step is a cornerstone of a well-executed server decommissioning checklist.
Why This Step Is Crucial
Mapping dependencies is fundamental to business continuity. It allows you to create a precise, sequenced shutdown plan that migrates or retires services in the correct order, preventing operational disruptions that can lead to lost revenue and productivity. For a university retiring a legacy server, this might mean discovering that the Learning Management System (LMS) relies on it for authentication services. This knowledge enables the IT team to migrate the authentication service first, ensuring students and faculty never lose access during the transition.
Actionable Implementation Tips
To effectively map all dependencies and ensure a seamless shutdown, follow these best practices:
- Utilize Automated Discovery Tools: Employ network and application performance monitoring (APM) tools to automatically scan your environment and map communication pathways between servers and applications.
- Conduct Stakeholder Interviews: Speak directly with application owners, developers, and system administrators. They often have invaluable institutional knowledge about undocumented dependencies or custom scripts.
- Create Visual Dependency Maps: Use software like Visio, Lucidchart, or draw.io to create clear, visual diagrams of the server's connections. This makes complex relationships easy for all stakeholders to understand.
- Review Network Traffic Logs: Analyze firewall, switch, and server logs to identify all incoming and outgoing connections over a representative period, such as a full business month.
- Test Failover Systems: Before decommissioning the primary server, intentionally trigger a failover to its backup or redundant counterpart to confirm that the secondary system can handle the load as expected.
9. Decommissioning Execution and Monitoring
With all planning, approvals, and data sanitization complete, this step marks the physical execution phase of the server decommissioning checklist. This is where the theoretical plan meets operational reality. It involves the methodical shutdown of servers, the disconnection of network and power infrastructure, and the final documentation of each asset's status before it is physically moved. This process must strictly follow the sequencing plan to prevent unplanned service disruptions.
The execution phase is a high-stakes activity where precision and communication are paramount. A single misstep, like unplugging the wrong server or miscalculating dependencies, can trigger cascading failures across the production environment. Real-time monitoring and detailed logging provide a crucial feedback loop, allowing teams to track progress against the plan, identify any anomalies, and keep all stakeholders informed from start to finish.
Why This Step Is Crucial
Careful execution and monitoring prevent costly operational errors and ensure business continuity. For enterprise IT teams executing a large-scale hardware replacement during a tight maintenance window, following a documented runbook is non-negotiable. It guarantees that services are brought down and back up in the correct order, minimizing downtime. This disciplined approach provides a clear, auditable record of every action taken, which is vital for change management, compliance audits, and post-mortem reviews.
Actionable Implementation Tips
To ensure a smooth and successful execution phase, integrate these practices:
- Schedule During Approved Windows: Always perform decommissioning activities during pre-planned, stakeholder-approved maintenance windows to minimize business impact.
- Use Detailed Runbooks: Equip technical staff with step-by-step checklists or runbooks that detail every action, from specific commands to the physical sequence of unplugging cables.
- Assign a Project Manager: Designate a single point of contact to oversee the execution, monitor progress, document all activities in real-time, and act as the communication hub.
- Have Rollback Plans Ready: Before starting, ensure you have documented and tested rollback procedures. If an unexpected issue arises, the team must be able to quickly revert changes to restore service.
- Maintain Constant Communication: Use a dedicated channel (e.g., Slack, Teams) to provide live updates to all stakeholders, confirming when key milestones are completed.
10. Post-Decommissioning Verification and Certification
The final step in a secure server decommissioning checklist is the post-decommissioning verification and certification. This stage is where you formally close the loop, confirming that every task has been completed, every piece of data has been provably destroyed, and all assets are accounted for. This critical validation process provides the necessary evidence to satisfy internal audits, regulatory requirements, and stakeholder inquiries, transforming the physical act of decommissioning into a documented, compliant business process.
This final verification is not merely administrative paperwork; it is your organization's ultimate proof of due diligence. It demonstrates that you have managed the end-of-life process for sensitive assets responsibly. For a healthcare organization, this means having the Certificate of Destruction ready to prove HIPAA compliance. For a government agency, it involves closing out formal asset disposition records to maintain public trust and accountability. Without this step, the entire decommissioning project remains an open liability.
Why This Step Is Crucial
Verification and certification provide the auditable proof necessary to defend your organization's actions. It formally transfers liability for the physical assets and data to your ITAD partner, such as Reworx Recycling. This documentation is invaluable during compliance audits or in the event of a security incident investigation. Furthermore, collecting weight certifications for recycled materials allows corporate sustainability departments to accurately report on e-waste diversion and environmental impact, reinforcing corporate social responsibility goals.
Actionable Implementation Tips
To ensure a thorough and successful verification phase, implement these best practices:
- Create a Final Close-Out Checklist: Develop a specific checklist to confirm every previous step, from data sanitization to network port closure, has been completed and signed off.
- Centralize All Certificates: Collect and digitally file all Certificates of Destruction and Sanitization in a secure, centralized repository. Link these certificates directly to the asset records in your CMDB.
- Verify Asset Management Updates: Audit your asset management system to confirm that all decommissioned servers are marked as "retired," "disposed," or "recycled," and their final disposition is noted.
- Obtain Sustainability Metrics: Request weight certifications and recycling reports from your ITAD vendor to quantify your e-waste diversion efforts for ESG (Environmental, Social, and Governance) reporting.
- Conduct a Post-Project Review: Schedule a meeting with the decommissioning team and stakeholders to review the project, document lessons learned, and refine your server decommissioning checklist for future use.
10-Point Server Decommissioning Checklist Comparison
| Activity | Implementation Complexity 🔄 | Resource Requirements ⚡ | Expected Outcomes 📊 | Ideal Use Cases 💡 | Key Advantages ⭐ |
|---|---|---|---|---|---|
| Data Security Assessment and Classification | High 🔄🔄🔄 — inventory & classification effort | Expertise, discovery tools, CMDB ⚡⚡ | Mapped sensitive data; compliance readiness 📊 | Regulated sectors retiring servers (healthcare, finance) 💡 | Prevents breaches; audit-ready documentation ⭐ |
| Stakeholder Notification and Planning | Moderate 🔄🔄 — cross-team coordination | PM time, communication tools, templates ⚡ | Aligned stakeholders; minimized surprises 📊 | Org-wide decommissions, calendar-sensitive schedules 💡 | Reduces downtime risk; builds buy-in ⭐ |
| Data Backup and Migration Planning | High 🔄🔄🔄 — complex validation & testing | Backup storage, migration tools, test environments ⚡⚡⚡ | No data loss; validated restore capability 📊 | Critical systems migrations (financial, clinical) 💡 | Ensures recoverability; lowers migration failure risk ⭐ |
| Secure Data Destruction and Sanitization | Moderate-High 🔄🔄🔄 — compliance-focused processes | Certified vendors, destruction equipment, certificates ⚡⚡⚡ | Irreversible data removal; compliance proof 📊 | High-sensitivity media disposal, resale/donation prep 💡 | Eliminates recovery risk; provides CoDs for audits ⭐ |
| Physical Inventory Audit and Asset Tracking | Moderate 🔄🔄 — detailed asset capture | Barcode scanners, CMDB/EAM, photography ⚡⚡ | Complete asset records; enables value recovery 📊 | Large data centers, universities, asset-heavy orgs 💡 | Prevents loss; supports financial write-offs & resale ⭐ |
| Environmental Compliance and Regulatory Documentation | Moderate-High 🔄🔄🔄 — jurisdictional complexity | Compliance/legal staff, R2/e-Stewards recyclers ⚡⚡ | E-waste compliance; ESG reporting documentation 📊 | Multi-jurisdiction operations, sustainability programs 💡 | Avoids fines; demonstrates responsible disposal ⭐ |
| Financial Reconciliation and Asset Write-offs | Moderate 🔄🔄 — accounting coordination | Finance team, appraisals, disposal records ⚡⚡ | Accurate write-offs; documented tax treatment 📊 | Organizations with material capital assets 💡 | Maximizes recovery; audit-ready financial records ⭐ |
| Application and Service Dependencies Mapping | High 🔄🔄🔄 — technical discovery needed | Dependency discovery tools, architects, app owners ⚡⚡⚡ | Identified dependencies; sequenced shutdowns 📊 | Legacy/complex architectures with interconnected apps 💡 | Prevents cascading outages; informs continuity planning ⭐ |
| Decommissioning Execution and Monitoring | High 🔄🔄🔄 — time-sensitive operations | IT staff, monitoring, runbooks, PM oversight ⚡⚡⚡ | Controlled shutdown; real-time issue resolution 📊 | Active decommission windows in production environments 💡 | Minimizes disruption; enables rapid rollback ⭐ |
| Post-Decommissioning Verification and Certification | Moderate 🔄🔄 — documentation consolidation | Compliance staff, vendor certificates, audit time ⚡⚡ | Certificates filed; project closed with evidence 📊 | Regulated industries needing auditable closure 💡 | Provides audit trail; confirms compliant disposition ⭐ |
Partner with Reworx for a Seamless and Socially Responsible Decommissioning Process
Navigating the intricate steps of server decommissioning is a critical operational function that carries significant weight for data security, financial compliance, and environmental responsibility. As this comprehensive checklist has demonstrated, a successful project moves far beyond simply unplugging a machine. It requires meticulous planning, from initial stakeholder notifications and dependency mapping to final asset write-offs and post-decommissioning verification. Each phase, whether it's the secure data sanitization or the detailed physical inventory audit, plays an indispensable role in mitigating risk and ensuring a smooth transition.
Mastering this process is not merely an IT task; it is a strategic business imperative. A well-executed server decommissioning protects your organization from devastating data breaches, ensures you meet stringent regulatory requirements like GDPR or HIPAA, and prevents unforeseen service disruptions. Furthermore, it reflects a commitment to operational excellence and responsible stewardship of both digital and physical assets. The difference between a chaotic, high-risk shutdown and a seamless, secure one lies in the adherence to a structured, proven methodology like the one outlined here.
Beyond the Checklist: The Value of a Strategic ITAD Partner
While a robust server decommissioning checklist provides the necessary framework, the execution phase introduces logistical complexities that can strain internal resources. This is where a strategic partner becomes invaluable, transforming a complex obligation into a streamlined and impactful process. The goal is to move from a reactive, task-based approach to a proactive, strategic partnership that manages the entire asset lifecycle securely and sustainably.
Consider the final, yet most crucial, stages of the checklist: environmental compliance, asset recovery, and certified disposal. These steps carry their own set of legal and ethical responsibilities. An expert partner not only guarantees that these are met but elevates them.
Key Takeaway: The ultimate goal of a
server decommissioning checklistis to transition retired assets from an operational state to a final disposition with zero security incidents, zero compliance failures, and maximum value recovery or positive environmental impact.
Transform Your Decommissioning into a Community-Building Opportunity
This is where the mission of Reworx Recycling aligns perfectly with the needs of modern, socially conscious businesses. We don't just see retired servers; we see opportunities. We see the potential to bridge the digital divide, to equip non-profits with vital technology, and to create workforce development opportunities. By choosing a donation-based social enterprise for your IT asset disposition (ITAD) needs, you fulfill every requirement of your server decommissioning checklist while making a tangible, positive impact on the community.
Your decommissioned equipment, after undergoing certified data destruction and refurbishment, can empower a local school, support a community center, or provide a deserving individual with the tools they need to succeed. This transforms a routine operational cost center into a powerful demonstration of your company's commitment to corporate social responsibility (CSR). You protect your data, comply with regulations, and champion sustainability, all while directly contributing to a stronger, more equitable community. This holistic approach ensures that the end of your servers' lifecycle marks the beginning of a new chapter of opportunity for others.
Ready to implement a server decommissioning checklist that not only protects your organization but also gives back to the community? Partner with Reworx Recycling to handle every aspect of your ITAD needs, from secure data destruction to certified, donation-based recycling. Visit Reworx Recycling to schedule a pickup or learn how your retired assets can make a powerful difference.